Tuesday 19 December 2017

Creative Expressions


Christmas Cards .

Hi there , here are a few Christmas Cards that I made , and then decided to show them on my blog .
They are all made the same way despite the fact that they all look different.


On a piece of either white or black card approximately 61/2 by 41/2 inches I created  a coloured area by dabbing Distress Oxides through a paper aperture , either rectangular or circular . To make this , draw the shape onto paper and then cut out the aperture. Instead of trying for a neat line I made the edges of the shapes irregular . Much easier than keeping perfectly to the line ! 
This can be placed over the card and used as a stencil  . I've blended several different colours within the area , any of the blues , greens or purples will work .


After the coloured area was dry I stamped the images with either archival black ink , or where I have used embossing powder I have used an Embossing ink .


I then mounted the decorated card  on silver or black card and then onto a card blank .


The  words were embossed onto a small piece of card then mounted onto contrasting card before attaching to the card with foam pads .


These don't take long to make and look nice so I hope they help if you need to make last minute cards . 
Creative Expressions products I used :-
Creative Expressions Clear Stamps -: 
Winter Scene, Snowflake Kisses, Winter Wonderland and Festive Traditions.
Cosmic Shimmer Detail Embossing Powder, True White and Silver Shine .
Foundations Card , Black and Coconut White .
Foundations Pearl Card , Steel.
Various Distress Oxides.

If you want to see what other members of the CE Design Team are doing please look at Creative Expressions

Thursday 30 November 2017

Creative Expressions

A Festive Arched Window .


Hi there , here I am back again with a post for Creative Expressions.
This is a mixed media piece using the MDF Free Standing Arched Window which I stuck together before painting the whole thing with Black Gesso. When this was dry I stamped ivy leaves from the stamp set Festive Traditions Carol Singers randomly over the frame and embossed with silver powder  .

To create the backgrounds in the windows I used Distress Oxide inks onto white card ;. Dab some of the oxides onto a craft sheet , spray with a little water and swirl the card over the ink . The main colours  I used were Wilted Violet , Cracked Pistachio and Faded Jeans . I then dabbed the same or similar colours through stencils with cut and dry foam to add some interest . The top right is interesting because I used a die cut piece from a Sue Wilson Die , Twinkle Star Frames , as a stencil .


I used some of the coloured card left over from making the windows to die cut some foliage from Sue Wilson dies , Trailng Ivy and Berry Bough .
I stamped and embossed with black powder each of the Window pieces :
Top right , Reindeer and Stars ,
Top left , Branches ,
Bottom left , Trees , all from stamp set Winter Wonderland.
Bottom right , Mistletoe, from stamp set Festive Traditions Carol Singers .


I then attached the backgrounds into the windows before adding the decorations . In this picture I'd already added the Poinsettia before taking the picture , sorry .


The holly leaves , from the Grab Bag of MDF pieces were triple embossed with silver powder  . The berries were covered with glib and glitter . After I stuck the holly leaves in place I added some of the ivy .


I added dots of glue to the front tree and added more glitter ( actually although I rarely use glitter there's a lot on this piece ! ) . I put some glue inti the bottles which will eventually dry clear revealing the glitter that I also added to the bottles ! More ivy and some bits of bling were then added .


The Poinsettia was cut from another Sue Wilson Die , Classic Poinsettia . I only cut the two smaller flowers and then applied Pearl Lustre Gilding Polish before sticking the flower together . I tucked some of the Die cut Berry boughs under the flower There are three tiny pine cones, glittered , in the centre of the piece.


Here is more of the ivy and Berry boughs here . The silver rail is a silver embossed piece of Die cut frame from the Twinkle Star Die . I've added a painted pine cone and a tree Bauble and beads .

Of course you could easily change the colour scheme and use different embellishments to create something unique . So I hope this has inspired you to create something wonderful .

I've used various Creative Expressions products, here are a few of them , the whole list is on the CE website :- 
Dies by Sue Wilson , Festive Collection- Twinkle Star Frames , Classic Poinsettia and Berry Bough .
Finishing Touches - Trailing Ivy .
Creative Expressions Clear Stamp sets - Winter Wonderland and Festive Traditions Carol Singers .
Creative Expressions MDF Free Standing Arched Window and Christmas Mega Grab Bag.
That Special Touch Mask Chicken Wire .

If you want to see what other members of the CE design team have made please go to 

Thursday 16 November 2017

Creative Expressions

Two Contrasting Cards , One Stamp .

Hi there , today I've used the same stamp to show you two different cards using the same stamp.
I used the Butterfly Collage stamp by Woodware as the basis of these cards . It's a lovely stamp that has so many uses .


For the first card I used fabric to stamp on . I have tried using different types of ink to stamp onto fabric but I find that I can never get a good bold image . So I used black Gesso applied to the stamp with cut and dry foam . When the paint is thoroughly dry the rest of the fabric can be coloured with Fabric Lustre Paints . I used four colours ( see below ) and mixed the pink and blue to create a purple . Water the paint down to make a wash and apply it randomly to the fabric . I used the French Pearl to add highlights to the butterfly wings .
I mounted the fabric on white card to stiffen it . I rubbed Gilding Polish around the edges of the black mount . As usual I added some lace and bits and pieces from my stash to finish the card .


For the second card I stamped and embossed the design twice onto white card . I also stamped some butterflies from another Woodware stamp ( Vintage Pocket Watches ) and embossed them gold as well . I used a little water colour to add a little definition. Once dry I cut out the butterflies and also the two butterflies from the collage . If you look you can see that I have cut the lower left hand butterfly with the quote which would be covered and lost behind the frame .
The frame is cut using the Twinkle Star Frame Die , and the Collage was trimmed to sit behind it . I added more white card behind the frame to make it stand out .
I've curled the butterflies and attached them with dimensional glue to add dimension. Finally I added a bit of lace and a few flowers .
I hope this inspires you to use stamps in different ways .
Creative Expressions products used for these projects :-
Woodware Clear Stamps -- Butterfly Collage  and Vintage Pocket Watches .
Sue Wilson Craft Dies , Festive Collection- Twinkle Star Frame .
Cosmic Shimmer Fabric Lustre Paints-- Atlantic Blue , Moroccan Rose , Golden Lime and French Pearl.
Cosmic Shimmer Black Gesso .
Cosmic Shimmer Detail Embossing Powder-- Gold .

If you want to find out what other members of the DT are doing please go to 

Wednesday 15 November 2017

PaperArtsy

Shades of White .


Hi there , today I am going to share a few photos from my latest post on the PaperArtsy Blog . I'm not going to spend time describing how I created this project because I have done that already on the  PaperArtsy blog . So if you want to find out more or see what the other talented people have been doing please go toPaperArtsy


Hope you like it . Back soon ! 

Thursday 12 October 2017

Creative Expressions Winter Tags


Tag 5 Poinsettias

Well I'm back with the final tag of this set . Although I don't use dies a lot the main part of this tag is created using a lovely Poinsettia Die by Sue Wilson.


Again the background was painted in the same way as described for tag 1  . I mixed a little of the green paint with texture paste and spread it through the Acorn Leaves stencil. Once dry I rubbed the gilding polish mix over the raised areas and around the edges of the tag .


I stamped the Flourish as shown using a mixture of glitter and white embossing powder . I added a little lace from my stash along one edge .


To make the Poinsettias I used the lovely Poinsettia Die  by Sue Wilson to cut two large , two medium and one small flowers , also two centres from Coconut White foundations Card .  These act as supports for the flowers which are cut from a very fine calico and an embroidered net . Yes the Die cuts fabric ! I cut two pieces of each fabric for each piece of card . The fabric is layered over the card , one piece on the petals and the second at an angle , first the calico as seen at the bottom right of the picture. Then layer the net over the calico in the same way. I then stuck the medium onto the large flowers . Before attaching the centres I stuck glitter to them and added a pearl in the centre . Once the glue is dry the card can be lifted a little to add dimension to the flowers .


I stuck the flowers in place as shown and added a few  pearl flourishes from my stash .


Creative Expressions products used for this tag:- 
Creative Expressions Clear Stamps, Inky Christmas.
That Special Touch Mask, Acorn Leaves .
Creative Expressions Craft Dies by Sue Wilson Classic Poinsettia.
All other items are the same as used for the other tags .

So that's the fifth and last tag . I hope that you have enjoyed sharing them with me .
If you want to see what other members of the CE DT have been doing please go to
Creative Expressions

Wednesday 11 October 2017

Creative Expressions Winter Tags


Tag 4 Little Angel.

Hi there , I'm back again with tag 4 . I've used a Little Angel from the Christmas Grab Bag which I've decorated and given a pretty skirt to . After all even angels want pretty skirts!


I've coloured the MDF Angel with several layers of Embossing Powder. Perfect Medium can be applied directly to the MDF and then emboss with two layers of silver powder and a final layer of Tropic Aqua Blaze. I treated the MDF Star in the same way , but applied Persian Sea Aurora first and silver last . Adding several layers of Embossing Powder like thief creates a smooth rich surface and by using more than one colour creates interesting effects .


The skirt is made from an old lace handkerchief that I cut a corner from . I gathered the long edge with a small running stitch and pulled it tight so  it fitted over the Angel . The corners can be tucked under the arms and then stick the skirt in place . A few tiny pearls hide the edge .


I stamped and embossed  , in silver , the Floral corners from the stamp set across the base of the tag . There is also a floral swag in this stamp set which I stamped and embossed twice across the top of the tag.


I used dimensional glue to attach the star and angel to the tag . The tag was completed by attaching pearls and roses as shown .
I think the little angel looks very happy in her new skirt ! 

Creative Expressions products used for this tag:- 
Creative Expressions Clear Stamps, Christmas Eve.
MDF. Christmas  Mega Grab Bag .
Cosmic Shimmer Embossing Powder, Persian Sea Aurora, Tropic Aqua Blaze and Detail Silver Shine .Self Adhesive Pearls Cream 8mm .
Silver Organza Ribbon Roses .

If you would like to see what other members of the CE DT are doing please look at  Creative Expressions


Tuesday 10 October 2017

Creative Expressions Winter Tags


Tag 3 Winter Reindeer.

Hi there , I'm back with tag number three , again with a painted background as described for tag 1 . I made this background a little darker by using more paint .


I cut a piece of corrugated card to fit over the tag as shown , then tore away some of the surface paper to reveal the corrugations. I painted these revealed areas with the purple paint I mixed for the backgrounds. Next I used a stencil to create a poinsettia like effect by spreading texture Paste through it . Once dry I painted the rest of the card with the colours id used before..  Finally I rubbed some of the gilding polish mix over the raised areas and around the edges .


I mixed some of the purple paint with texture Paste and spread this through the cross stitch stencil onto random areas on the tag . Once dry I rubbed the gilding polish mix over the raised and around the edges. Finally I stamped holly leaves from the stamp set , with black ink , onto the remaining
areas .

I stamped and embossed in gold the words onto black mount board. I then cut out he words and coloured around the edges with a black alcohol pen to hide the white edges .


I painted both the Reindeer and the Dove with white Gesso before rubbing Pearl Lustre gilding polish over them both . I added glitter by putting glue onto the areas that I wanted glitter.
The lace is from my stash and the ribbon with pearls on it came from a haberdashery store .


I then glued all the pieces together as shown .
I hope that you are enjoying the tags so far , but there's still two more to come !

Creative Expressions products that I used for this tag :- 
Creative Expressions Clear Stamps, Christmas Past for the holly and 
   Winter Scene for the words .
That Special Touch Mask, Floral Elements and Cross Stitch .
Cosmic Shimmer Texture Paste, Soft White .
MDF Reindeer Accessory Pack and MDF Mega Grab Bag.

If you want to see what other members of the CE DT are doing please look at
Creative Expressions.Creative Expressions


Monday 9 October 2017

Creative Expressions Winter Tags


Tag 2 Pretty Baubles

Hi there , I'm back again with tag 2 of the set of five . I hope you enjoyed the tag yesterday .
I described the background preparation yesterday so we can go straight onto the fun bit of decorating this tag !

To start decorating the tag I stamped and embossed, using Persian Sea Aurora, the ivy from the Carol Stamper stamp set .
I then mixed a little of one of the paint colours with Soft White Texture Paste, before spreading it through a stencil . I used That Special Touch Mask Trellis . Once dry I rubbed some of the mixed Gilding Polish that I made for these tags ( see tag 1 ) . Finally I added dots of glue and sprinkled glitter on it .


The Baubles were stamped and embossed onto mount board using Black Embossing Powder . I cut them out and used a black alcohol ink pen to colour the edges of the mount board and neaten them . I used mount board so that the Baubles stand out on the tag .


I coloured the Baubles with Gilding Polish . This can be used as paints by mixing them with water , and they can be mixed to create the colours needed . I used Purple Paradise , Powder Blue and Fern .
The tops of the baubles are made by tying a ribbon bow around a Pearl Topped Stick Pin and then the baubles and Pins were attached to the tag with dimensional glue .


Creative Expressions products used for this tag :- 
Stamps to Die For , Mini Christmas Scene and Leafy Bauble and  Mini Ornate and Beaded Bauble .
Creative Expressions Clear Stamps , Carol Singers .
That Special Touch Mask, Trellis .
Cosmic Shimmer Embossing Powder, Persian Sea Aurora.
Cosmic Shimmer Gilding Polish Mix as before and Purple Paradise, Powder Blue and Fern .
Creative Expressions Pearl Topped Stick Pins , White .
Cosmic Shimmer Glitterbitz, Vintage Violet .

If you would like to see what other members of the CE DT are doing go to 

Sunday 8 October 2017

Creative Expressions Winter Tags


Hi there , to any and all of you who look at this blog , you may have noticed that I have been rather quiet of late . This is mainly due to being very unwell , which makes it very difficult for me to be creative.
By way of an apology to anyone who regularly checks this blog and particularly to those lovely people at Creative Expressions I have created a set of five large tags with a Winter theme which I will post over the next few days . I hope you enjoy them .

Five Winter Tags .

I have made these tags as a set , so the colours I have used all coordinate . In view of this I an going to explain the preparation for all the tags here and not repeat myself for the other tags . Also I'll give a list here of the items I used which are the same for all the tags so that I don't bore you by repeating them each time !
I've cut all these tags from greyboard . They are all similar sizes but I've made each top slightly different. Once cut out I painted each tag with two coats of white Gesso .

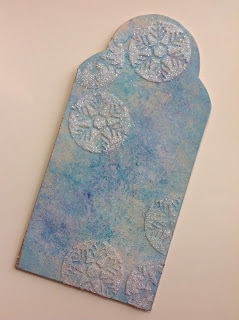
I then made all the backgrounds using a technique inspired by old fashioned sponging . I like this effect but if you are going to stamp on it it can be difficult because the surface will be slightly knobbly. So I add colour using wet wipes to create a similar effect that is smooth . Pick up a little colour onto a scrunched up wet wipe and dab it onto the surface randomly. Because the wipe is wet the colou can then be spread out creating lighter and darker patches .


I tend to start with the darkest colour and work towards the lightes. The blue-purple is a mix of Sea Turtle and Samba Pink. I also used Sea Turtle and Blue Boy . Keep dabbing and spreading the colours until you get a pleasing effect . Finally I added some Flushed Cheeks to add a warm glow .


Here are the finished backgrounds. The lighter ones are created using the same colours but much less paint . By adding different amounts of each colour you will create slightly different effects that all tone together.

Tag 1 Happy Reindeer .


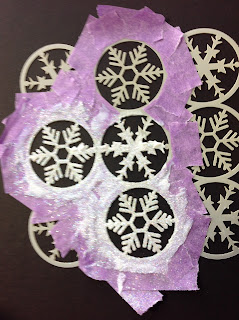
To create the first tag , once the paint is dry I added some texture by spreading clear Texture Paste through a stencil .


I masked part of the stencil so that I could just add some of the snowflakes and once I had spread the Paste through the stencil I pored glitter onto it so that the glitter would stick . The Paste is clear so all that will show is the glitter , but it will be raised .


I stamped the Snowflake ring onto the tag and around the glittered snowflakes (once dry ) with perfect medium and embossed the design with Persian Sea Aurora.

The large stars  are from the Christmas Mega Grab Bag , painted with White Gesso. I  then wiped Pearl Lustre Gilding Polish over them and let it dry .
I mixed three different gilding polishes together to get the colour I wanted and kept it in a sealed pot so I could used on the other tags ( Pearl Lustre, Silver Hessian and Gold Treasure ) . I used this to add colour to the tips of the stars . I then used glue to adhere glitter to the stars and to some flat backed pearls for the centre of the stars .

I used the same method to colour the Reindeer before stamping and Embossing the starry circle onto the Reindeer.


To finish the tag I stuck some lace from my stash at the bottom to suggest snow before adhering the stars and Reindeer to the tag ..

Creative Expressions products used to create the backgrounds:- 
Cosmic Shimmer Gesso White.
Cosmic Shimmer Acrylic Mixed Media Paint , Flushed Cheeks, Sea Turtle, Blue Boy and Samba Pink.
Cosmic Shimmer Gilding Polish, Pearl Lustre, Silver Hessian and Gold Treasure.
Products used for this tag :- 
Creative Expressions Clear Stamps , Winter Scene.
That Special Touch Mask, Snowflakes .

Cosmic Shimmer Texture Paste, Clear 
MDF Reindeer Accessory Pack and MDF Christmas Mega Grab Bag .
Cosmic Shimmer Embossing Powder, Persian Sea Aurora.
Cosmic Shimmer Diamond Frost Glitter .
Creative Expressions Self Adhesive Pearls Cream 8mm.


If you would like to see what other members of the Creative Expressions DT are doing go to