Tuesday 26 January 2016

Creative Expressions Tuesday

Rose Box.

For the last week in January I have made a very romantic set of a box and tag because there is a certain date coming up in February which will be here far too soon ! I have used John Lockwood 's stamp set again to show how versatile these stamps can be .
Both the box and the tag were painted with a coat of cosmic shimmer white gesso, both to seal the wood and to make a white base to stick the decoupage paper to . When the paint was dry I covered both the box and the tag with Craft Consortium decoupage paper by painting the surface with cosmic shimmer Matt glue, seal and glaze and smoothing the paper over the surface . I used more of the glue to paint over the top of the paper and seal it . I rubbed Colour Cloud , Pretty in Pink , around all the edges of both pieces .

Using the A5 stamp set , Create a Swirl , I stamped using perfect medium and embossed using silver powder , swirls randomly over the surfaces . I then stuck some Guipure lace diagonally across both the box and tag .
I rubbed the same colour cloud ink over some coconut white card and then stamped the roses and leaved onto the card . By applying the ink first the roses are already coloured to tone with the background . I also painted the roses using iridescent mica powders before cutting them out . The frame was stamped onto the same card and painted with the mica powders .


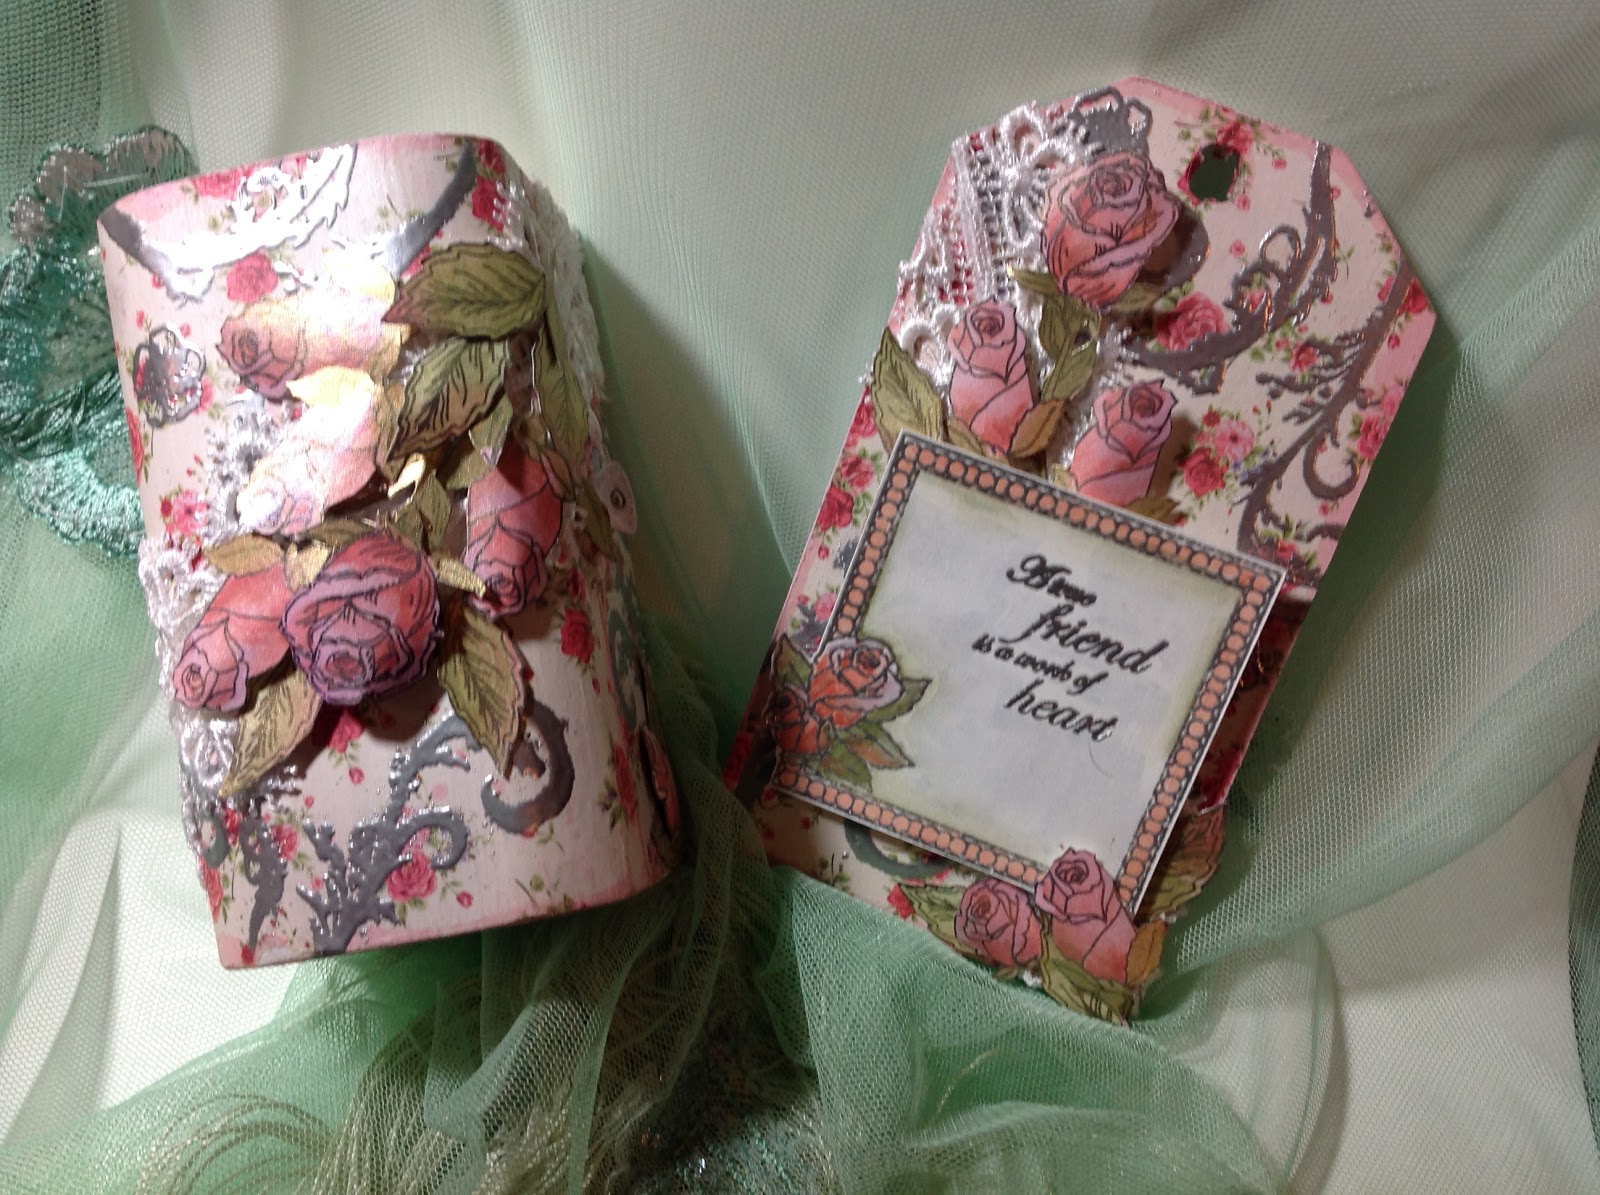
Finally I shaped the flowers and leaves and attached them to the box and tag using dimensional glue so that the was some shape to the roses .
I used the following products to create these projects : -
John Lockwood Stamps Rosebud Elements , Craete aSwirl A5 stamp sheet  , Craft Consortium Decoupage Paper - Antique Rose , Colour Cloud Ink - Pretty in Pink , Cosmic Shimmer white Gesso , Cosmic Shimmer silver embossing powder , Cosmic Shimmer Matt Glue , seal and glaze , cosmic Shimmer Irridescent Mica Powders and Guipure Lace .
I'll be back next week with another project . Bye for now l

Please click here to see what the other members of the Creative Expressions Design Team have been creating: blog.creative-expressions.uk.com

Tuesday 19 January 2016

Creative Expressions Tuesday

Dreaming.

Hello there , I'm back again with my regular blog post for Creative Expressions. I've made this project on a large tag shape which I painted with gesso to create a base to work on . I then rubbed Colour Cloud Inks randomly over the whole of the gesso .
I used That Special Touch Mask -- Counterpane -- to create texture by spreading Texture Paste through it . Once this was dry I rubbed gilding wax over the raised areas and around the edges of the tag .
I used the Creative Expressions stamp set -- Steampunk Dreams -- to create the background and the main elements for this tag . It's a lovely collection of images that is rather unusual. I used the cogs to stamp the background using blue and purple ink for variation . I also used the crackle background stamp from the Butterfly set , which I stamped using  mushroom ink so that it was very subdued .


I stamped all the  images onto coconut white card using Black embossing powder and cut them out . I also stamped a few of the smallest images directly onto the tag . I stamped two of the winged 
mannequins so that I could have a double layer on the tag to create some dimension, and I cut off the 
wings and stand on the second image . I painted all of the images using Cosmic Shimmer iridescent mica pigments. I then curled the wings and the body of the mannequin before adhering them to the tag with dimensional glue .


The quote , from the Steampunk Dreams set , was stamped and embossed onto coconut white card 
which was then mounted on black card  . This was stuck to the tag with dimensional glue and some 
self adhesive pearls were added . I added more pearls to the tag and cut up some of the adhesive swirl pearls to add a little sparkle.


I have used the following items from Creative Expressions to create this project : --
Stamp Sets , Steampunk Dreams and Butterfly , That Special Touch Mask , Counterpane , Colour 
Cloud ink, Ocean Blue , Decadent Grape and Pretty in Pink, Various Self adhesive Pearls .


So that's all for now , but I'll be back with mo r e next week .

Please click here to see what the other members of the Creative Expressions Design Team have been
creating: blog.creative-expressions.uk.com


Sunday 17 January 2016

Beautiful Hanging


Hi there , l'm back again with a wall hanging which I think will brighten any wall! I've made this in contrasting colours of lilac and peach but it could be made in any colour you choose .
The individual pieces were cut out of heavy cardboard and painted on both sides with the base colour ( i always paint both sides of card or wood because if left unsealed the back can absorb humidity and warp . Also it looks neater ! ) . When all the pieces are decorated they are joined together with jump rings  and a chain is added at the top l


I mixed some of the base colour with texture paste and used this through various stencils to create some texture . I kept the stencilled texture to the sides and corners of the base pieces . Once the paste was dry I stamped swirls in other areas but again kept the stamping to the sides  . To finish the background I rubbed treasure gold around the edges and over the raised areas .    

The quotes were stamped on die cut pieces of white card .which were then stamped with flowers and coloured . The faces were stamped on white card and coloured . I only had one metal frame but really wanted to use this particular frame ! So I made a mould from the frame and then I was able to create enough frames for all three faces using paper clay . Once painted and rubbed with treasure gold the frames were just what I wanted.
I added some lace and then stuck the frames and quotes onto the bases . This is the best time to join all 
the pieces together with jump rings before any embellishments are added .


The flowers were die cut out of various coloured papers ( using a spiral floral die ) and stuck together before sticking them to the project . The butterflies are made from die cutting butterflies from craft metal , which is then covered on both sides with tissue paper , sticking it down using Matt medium . Another layer of Matt medium was painted over both sides of the butterflies to seal the tissue paper . Once dry they can be painted with suitable colours and I painted a layer of metallic glaze over the colour to make the butterflies shimmer .


To create this project I used PaperArtsy paints and glazes . The stamps I used for the quotes were
stamped from ELB05 and 06 . The faces , flowers and swirls are from EEB 03 ,04 and 06 .
To learn more about PaperArtsy and the products used go topaperartsy.co.uk


Tuesday 12 January 2016

Creative Expressions Tuesday

Seasons Change.

Good morning to everyone ! I hope that the current weather has not caused you too much trouble . Here is my second post for Creative Expressions which I want to share with you . I have used the same set of stamps by John Lockwood --- Rosebud Elements  --- because I love floral designs but I have made a completely different project with the stamps this time . It can be very interesting to see how many different ways one set of stamps can be used , so I hope you will like this .
I have used a very large tag made of cardboard which I painted with Cosmic Shimmer white gesso . The right side of the tag was coloured using three colours of Colour Cloud Blending Inks blended together in a random fashion . I then stamped the leaves from the stamp set randomly over the ink using the blue and green inks . As these dried they became less vivid which helped them fade into the background .
I then embossed some coconut white card using  the Large Sea Garden Embossing folder . I then rubbed perfect medium over the raised edges and embossed using Cosmic Shimmer -- Aqua Blush Blaze ( in places this has stuck to the lower areas but I don't feel that this spoilt the effect ) .
This was then stuck to the tag and trimmed around the edges to fit . I then finished the edges of the tag by rubbing Vintage Golden Green Gilding Wax all around the edge and rubbing a little extra over the embossed area .
The roses were stamped onto the same card and painted using Cosmic Shimmer Iridescent Mica Pigments before cutting them out . The large rose frame was stamped and painted in the same colours
and the centre was cur out .The background for the sentiment was coloured using the blue and green
inks ( these appear much more vivid because they are on paper and not on gesso ) . The sentiment
was embossed in gold . The frame was then adhered to the background so that it could be stuck to the tag with foam pads .

As you can see I then had fun arranging all the roses I had painted and cut out . Once I was happy with the arrangement I stuck them in place   .


The fine ribbon was painted with gilding wax to blend in with the colour scheme and a few pearls  were attached as seen .


Creative Expressions products used include : -
            John Lockwood Stamps -- Rosebud Elements
            Embossing Folder -- Large Sea Garden
            Colour Cloud Blending Inks -- Ocean Blue , Basil Leaf and Decadent Grape .
            Gilding Wax --  Vintage Golden Green .
            Cosmic Shimmer Iridescent Mica Pigments .

Back again next week , see you then

Please click here to see what the other members of the Creative Expressions Design Team have been creating: blog.creative-expressions.uk.com

Tuesday 5 January 2016

Creative Expressions Tuesday

Painting with Gilding Wax.
Good Morning everyone ! Today is my first post for the Creative Expressions Design Team .
I am delighted and very excited to be working for this wonderful company and am looking forward to  using some of their products to create some interesting pieces .I Hope that you will enjoy finding out about my ideas .
Today I will share with you a card that I made using only gilding waxes as colouring agents . I have used filing waxes in the normal way to colour the edges of the base card by rubbing Cast Bronze around the edges . I then used several waxes in a random fashion over embossed black card . I also rubbed Cast Bronze wax over a piece of card that I stamped a frame and quote onto . So far , quite normal . However I then decided to use the waxes as paints so that the colours all coordinated .
Again I rubbed Cast Bronze wax onto card to create the background for the roses and then stamped roses and leaves onto the card (I found that archival ink works best over waxes ) . To make the wax into paint mix a small amount with alcohol ink blending solution  . This mix can then be painted onto the stamped images in the normal way ( I keep special brushes for this , even if the wax has dried it can be softened and removed with the blending solution .)
I even used the wax paint to colour the lace  .
Once the wax paint has dried the whole card can be assembled as shown .

I used the following items from Creative Expressions to create this card ; Stamp set by John Lockwood  - Rosebud Elements .Embossing Folder - Fine Finials . Gilding Waxes - Cast Bronze , Deep Red , Pewter , Vintage Golden Green and Enchanted Gold . Crochet ribbon and Vintage Black Button .

I'll be posting regularly for Creative Expressions so I'll be back again next Tuesday .
Please click here to see what the other members of the Creative Expressions Design Team have been creating: blog.creative-expressions.uk.com

Monday 4 January 2016

Decorated Book

Hello to everyone . Well I have been a very bad blogger having not written anything for over a year  . Life has been rather hectic over that time ( my daughter and I have had four operations during this time and I am afraid that blogging was not possible ) . Luckily we are both well now and life is returning to normal . Finally I can devote time to my love of creating .


So , to celebrate the new year and returning to my blog I thought I would share this little book that I made . I was lucky to be able to teach this project to a craft group that I belong to in Manea , Cambridgeshire last year .i enjoyed myself and I hope that everyone there did too .
The covers are made from A5 size canvas covered board (normally used for painting on ) and the inside pages are made from watercolour paper , patterned paper and embossed acetate and then bound together using the Bind it All machine. However , really the decorated cover is the most important part of this project . As the boards are already covered in canvas there is some texture in the background before any more work is started ! 
The raised areas were created by spreading Grunge Paste through a stencil before painting the whole cover . Looking at the picture below the raised areas were highlighted with Treasure Gold before stencilling with paint through a different stencil . A few stamped flourishes finished the background .
The image is from a PaperArtsy set of stamps - Eclectica EEB03 - stamped on tissue paper , coloured and then attached to fabric with a Matt glaze . The cover was then decorated with lace and fabric flowers before attaching the stamped image .
Well that's all for tonight , but I will be back soon with more designs .
Grunge Paste , Paints and Stamps available from PaperArtsy .